Views: 0 Author: Site Editor Publish Time: 2026-08-03 Origin: Site
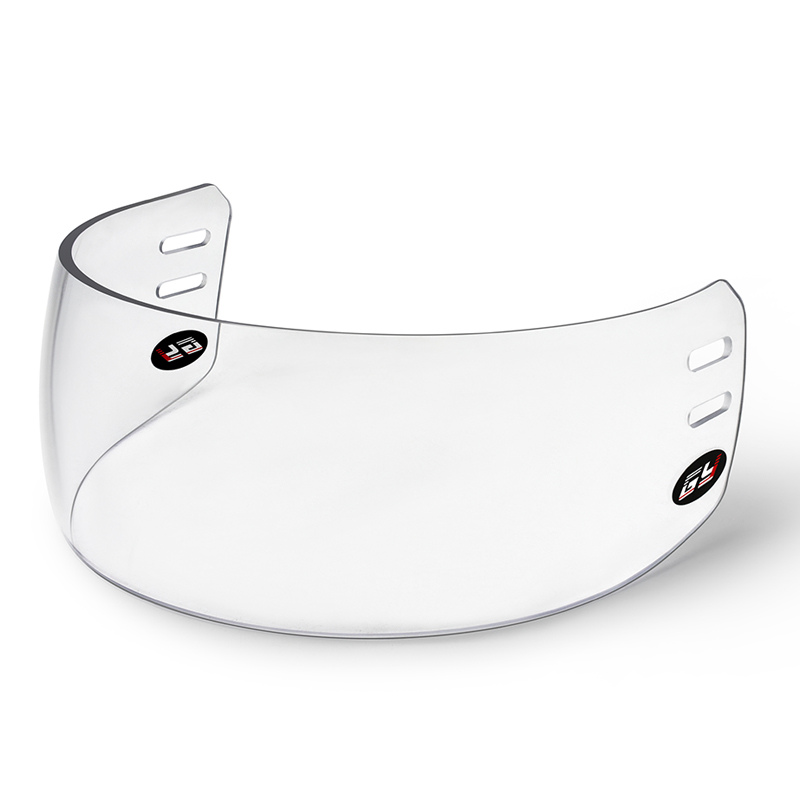
A loose or improperly aligned ice hockey visor compromises your peripheral vision on the ice. It drastically increases the risk of serious facial injury during high-speed collisions. Failing to mount this crucial protective equipment correctly can even void official helmet safety certifications like HECC or CSA. You cannot afford to overlook these basic hardware mechanics when upgrading your gear.
Our detailed guide provides a hardware-safe standard operating procedure for swapping out your old cage or shield. We show you exactly how to remove old hardware safely. You will learn to secure a new visor without damaging sensitive internal mounting points. By following these precise steps, you will achieve a securely mounted, perfectly tilted setup. Prepare your helmet for peak performance and hit the ice with absolute confidence.
Compatibility Matters: While many visors claim "universal fit," spacer requirements vary significantly between helmet models (e.g., Bauer vs. CCM).
Hardware Vulnerability: Over-tightening or using power tools is the leading cause of cracked visor shields and stripped helmet T-nuts.
The Spacer Sequence: Correct installation requires the exact layering of the helmet shell, spacer, visor shield, and screw to ensure structural integrity upon impact.
Keep Spare Parts: Always retain a backup helmet hardware kit; top-side screws and internal nuts are easily lost during the transition.
You must evaluate your gear before beginning the installation process. Proper preparation prevents stripped screws and structural damage to the helmet shell. We recommend dedicating time to confirm hardware compatibility and gather the right tools.
Players often assume all visors fit all helmets seamlessly. Manufacturers frequently advertise a "universal fit" design. However, the physical shell profile of your helmet dictates how well the visor mounts. Most shields fit most helmets only if you use the correct internal spacers. The spacer size bridges the gap between a flat visor mounting point and a curved helmet forehead.
You must check compatibility between the visor brand, the cut style, and your specific helmet profile. Different cuts serve different visual preferences and facial structures. Upgrading your Ice Hockey Visor requires understanding these variations.
Below is a comparison chart of common visor cuts and their typical fit profiles.
Visor Cut Style | Profile Description | Best Fit Scenario |
|---|---|---|
Straight Cut | Flat bottom edge across the shield. | Players seeking maximum, uniform facial coverage. |
Aviator Cut | Dips lower around the cheekbones, shorter near the nose. | Players wanting better lower-peripheral airflow and breathability. |
Pro-Cut | Slightly narrower vertically; stylized curves. | Experienced players prioritizing maximum airflow and less weight. |
Using improper tools guarantees installation failure. You need a standard manual #2 Phillips head screwdriver. We explicitly warn against using power drills or electric screwdrivers. Power tools apply excessive torque instantly. They will crack the polycarbonate shield or permanently strip the internal receiver nuts.
Always verify your hardware kit before starting. A complete installation kit includes specific components:
Two long mounting screws for the top front positions.
Two short mounting screws for side positions (if applicable).
Dual-width plastic spacers to manage helmet curvature.
Internal receiver nuts, commonly called T-nuts.
Working on a cluttered workbench leads to missing pieces. Set up your workspace on a flat, well-lit surface. We strongly recommend placing a thick towel or a rubber maintenance mat down first. This soft layer catches any falling T-nuts before they roll away. It also prevents accidental scratches on your new polycarbonate shield if you drop it during alignment.
Removing old hardware requires patience. Rushing this step often damages the internal foam liner or the plastic helmet shell. You must handle the receiver nuts carefully to maintain the integrity of the mounting points.
The front mounting points secure the top of your cage or shield. The exterior screw threads directly into an internal T-nut hidden behind the helmet foam. You must hold this internal T-nut flat against the inside of the helmet pad while loosening the exterior screw. Apply gentle pressure from the inside using your thumb.
Sometimes you will encounter a "spinning nut" scenario. The T-nut rotates freely, preventing the screw from backing out. You can mitigate this risk easily. Slide a thin flathead screwdriver or needle-nose pliers behind the foam liner. Hold the backing nut steady by gripping its flat edges. Turn the exterior screw slowly until it releases completely.
Transitioning from a full wire cage requires removing side-mounted J-clips. These clips sit near the temples and stop a cage from smashing into your jaw upon impact. Visors do not utilize these specific clips.
Locate the J-clips on both sides of the helmet. Unscrew them entirely and remove the plastic brackets. Do not leave these holes completely empty. Reinsert the short screws back into the bare holes. Tighten them down slightly. This simple action prevents the internal helmet liner from shifting out of alignment during play.
You must inspect the bare mounting holes before installing anything new. Check the plastic shell for stress fractures or visible fatigue. Look closely at the metal T-nuts for any signs of rust or cross-threading. Rusty nuts will eventually snap under impact stress. Replace any compromised hardware immediately to ensure maximum safety on the ice.
Executing a flawless installation guarantees structural integrity upon impact. Precision matters deeply when mounting safety equipment. Follow this standard operating procedure closely. It prevents warping and ensures your gear functions perfectly during a game.
Correct installation relies entirely on strict physical sequencing. We refer to this sequence as the hardware sandwich. You must layer the components in this exact order to disperse impact force properly. Start from the inside and move outward. The order is: Helmet Exterior Shell → Plastic Spacer → Visor Slot → Screw.
Begin by inserting the internal T-nuts into the top-front helmet holes. Press them firmly into the foam liner. Next, position the dual-width spacers against the exterior shell. Align the slots of your Ice Hockey Visor over the spacers.
Take your long mounting screws and hand-thread them into the top positions. Turn them only two or three times. Leave them loose. You need the shield to wiggle slightly for the next alignment steps. Do not tighten them yet.
Many modern shields utilize side-mounting points for added stability. If your model features these extended arms, shift your attention to the temples. Align the secondary spacers between the helmet shell and the visor arms. Thread the short side screws into the corresponding T-nuts. Again, leave these screws relatively loose to allow for final adjustments.
Now you must calibrate the physical position of the shield. You have an operational safety standard to meet. The bottom edge of the polycarbonate must align securely with the tip of your nose or rest just above your cheekbones.
Check the gap at the top forehead area. You should leave a small space for ventilation, but it must never be wider than a standard hockey puck. A gap too large allows a stick blade to slide underneath. Adjust the tilt manually until you achieve this precise positioning.
You are ready to lock the hardware down. Pick up your manual #2 Phillips screwdriver. You must tighten the screws in a specific alternating pattern to distribute tension evenly. Follow this tightening sequence:
Left top screw (partial turn).
Right top screw (partial turn).
Left side screw (partial turn).
Right side screw (partial turn).
Repeat this pattern until the screw heads sit flush against the plastic shield. Stop turning the screwdriver immediately once you feel firm physical resistance. Forcing the screw further will crack the polycarbonate shield instantly.
Players frequently encounter frustrating setbacks during hardware upgrades. Understanding these common failures saves you time and protects your equipment investment. Most issues stem from rushing the alignment process or misunderstanding spacer dynamics.
The following troubleshooting chart details the most frequent errors, their symptoms, and immediate solutions.
Installation Failure | Visible Symptom | Corrective Solution |
|---|---|---|
Cross-Threading the Screws | Screw goes in at an angle and jams halfway down. | Back it out immediately. Do not force it. Restart threading using only your bare fingers to ensure proper thread alignment. |
Missing or Backwards Spacers | The visor bows inward, aggressively squeezing your temples, or sits too far off the forehead. | Flip the asymmetrical spacers. The thicker side usually goes toward the curve of the helmet to relieve tension on the shield. |
Improper Ventilation Gap | Visor fogs up instantly when you step onto the ice surface. | Ensure the shield isn't mounted perfectly flush against the helmet brim. Create a micro-gap for top-down airflow. |
Cross-threading happens when you insert a screw at an incorrect angle. The threads bite into the metal improperly, causing the screw to jam tightly. If you encounter abnormal resistance during the first few turns, stop immediately. Back the screw out entirely. Forcing it down will permanently destroy the helmet's internal receiver nut. Always start threading the screw gently with your fingers before using a tool.
Spacers dictate how the flat plastic shield conforms to your rounded helmet. If you omit the spacers, the shield bends aggressively. It bows inward and painfully squeezes your temples. Alternatively, installing asymmetrical spacers backward forces the shield too far away from your face.
Flip the asymmetrical spacers if the fit feels wrong. The thicker side of the spacer usually faces the steepest curve of the helmet shell. This orientation relieves structural tension on the polycarbonate shield.
A perfectly flush installation looks sleek but traps body heat instantly. If your shield fogs the moment you start skating, you likely lack a top-down ventilation gap. The heat rising from your face needs an escape route. Loosen the top screws slightly. Slide the shield down a fraction of an inch to create a micro-gap near the brim. Retighten the screws. This small adjustment restores airflow and eliminates severe fogging issues.
Your responsibility does not end once the screws are tight. Proper maintenance extends the lifespan of the polycarbonate and ensures optimal visibility. Neglecting your gear leads to dangerous hardware failures mid-game.
Never hit the ice without conducting a final scratch test. First, peel off the protective outer film completely. Hold the helmet under a bright light source. Check the entire surface for factory defects. Look very closely at the plastic areas immediately surrounding the drill holes. You want to identify any microscopic stress fractures caused by over-tightening. If you spot tiny cracks radiating from the screw holes, you must replace the shield. It will shatter upon absorbing a heavy stick impact.
Polycarbonate requires delicate cleaning protocols. You must avoid standard household glass cleaners entirely. Products containing ammonia strip away factory-applied anti-scratch coatings rapidly. They leave the plastic brittle and prone to clouding.
We recommend using specific hockey-grade anti-fog sprays. Apply the solution generously. Wipe it away gently using a dedicated microfiber cloth. Paper towels contain abrasive wood fibers. They will leave thousands of micro-scratches across your line of sight over a single season.
Ice rink vibrations and constant transport in a heavy gear bag naturally loosen metal hardware over time. You must establish a consistent maintenance cadence. We advise checking screw tightness at least once a month. Keep your manual #2 Phillips screwdriver in your bag. Give each screw a quick quarter-turn check before stepping onto the ice for a critical game.
Properly installing your visor demands strict attention to detail and respect for the hardware. You must prioritize proper sizing, rely exclusively on manual tools, and follow a strict hardware sequence. Careful torquing prevents catastrophic plastic failures and maintains the integrity of your helmet shell.
An improperly mounted shield remains a severe safety hazard. If the final fit feels excessively forced or the plastic warps noticeably, step back immediately. Reassess your spacer alignment before playing. A well-installed shield should feel natural and sit completely secure.
We highly advise all players to stock up on an emergency helmet repair kit. Keep spare screws, T-nuts, and spacers in your hockey bag permanently. Do not let a single lost screw bench you during a championship game. Take control of your gear maintenance today for a safer game tomorrow.
A: Yes, you can usually mix brands. However, cross-brand compatibility relies heavily on using the correct universal spacers. Because Bauer and CCM helmets feature different forehead curvatures, you must test multiple spacer widths. Select the spacer that allows the shield to mount without bowing inward or squeezing the helmet shell.
A: Most brand-new retail visors include a complete hardware kit directly in the packaging. This kit features screws, T-nuts, and dual-width spacers. However, if you purchase an aftermarket or used shield, it rarely includes these pieces. You will need to buy a separate helmet hardware repair kit.
A: This happens when you install the shield without spacers or use the wrong spacer width. The flat polycarbonate shield pulls the flexible helmet shell inward as you tighten the screws. You must add thicker spacers behind the mounting points to bridge the gap and relieve this tension.
A: You should only use a clean, high-quality microfiber cloth. Never use paper towels or harsh chemical glass cleaners containing ammonia. Spray a specialized non-abrasive hockey anti-fog solution onto the plastic, then wipe gently in wide, circular motions to protect the anti-scratch coating.